
Using a kids instant print camera is usually simple: charge it, load the correct thermal paper, turn it on, take a photo, preview the image, and print only the pictures you want to keep.
This guide is written for parents who already bought the camera — or are about to — and want to know exactly how to set it up, help their child use it, avoid wasting paper, and turn it into something more useful than a novelty. If you are still learning what this type of device does, the guide on what a kids instant print camera is covers the basics first.
5-Step Quick Start
- Charge the camera
- Load thermal paper
- Turn it on
- Take and preview a photo
- Print the selected image
From Photo to Print
The five stages of every session
Kids Instant Print Camera
Power on, frame, capture, preview, print
Power
Turn on the camera and check battery status.
Frame
Help the child point the lens toward the subject.
Capture
Press the shutter button steadily.
Preview
Check the image before printing.
Send only selected photos to the built-in printer.
Power → Frame → Capture → Preview → Print
The preview step is the most important habit to teach. It reduces paper waste and helps children learn to make choices about what is worth keeping.
Before You Start: What You Need
Depending on the specific model, parents may need:
- Kids instant print camera
- Compatible thermal paper
- Charging cable
- Memory card, if required
- Wrist strap or lanyard
- Parent supervision
- A few simple photo ideas
Always use the accessories, paper type, charging method, and memory format recommended for your specific camera model. Check the product page or manual for exact specifications rather than assuming they match another brand.
Step 1: Charge the Camera
Charge before the first long play session
A full battery avoids frustration mid-activity. Charge it before a trip, birthday, or planned photo game.
Use the recommended charger and cable
Stick to the cable and adapter that came with the camera or that the manual specifies.
Keep the charging port dry
Moisture near charging ports is a common cause of damage. Wipe hands dry before handling.
Do not let young children handle charging unsupervised
Charging involves cables and power, which younger children should not manage alone.
Parent Tip
Charge the camera before a trip, birthday, or activity so the child can start using it immediately. Nothing kills excitement like a dead battery at the wrong moment.
Avoid giving exact charging times unless confirmed for your specific model. Battery capacity and charging speed vary between products.
Step 2: Load the Thermal Paper Correctly
This is where many buyers get confused. The general process is straightforward once you see it, but the paper must be oriented correctly.
Open the paper compartment
Follow the model’s specific instructions. Most have a latch or sliding cover.
Insert the compatible roll
Use the paper type the manufacturer recommends. Unverified rolls can cause blank prints or feeding problems.
Make sure the printable side is positioned correctly
Thermal paper has a coated side that reacts to heat. If it is reversed, prints come out blank.
Leave a short edge of paper outside the slot
This helps the printer grab the paper on the first print.
Close the compartment securely
An open or loose compartment can cause paper to jam or misalign.
If the camera prints blank paper, the roll may be inserted on the wrong side, or the wrong paper type may be installed. Check the orientation first before assuming the printer is faulty.
Thermal Paper Loading
Five steps to load the roll correctly
Open
Open the paper compartment as the manual describes.
Insert
Place the compatible roll inside the compartment.
Align
Check the printable side is facing the correct direction.
Close
Secure the compartment fully so the roll sits properly.
Test
Print one test image to confirm correct loading.
Open → Insert → Align → Close → Test Print
Step 3: Turn the Camera On and Learn the Main Buttons
Typical controls may include:
- Power
- Shutter
- Menu
- Back
- Up and down navigation
- Video mode
Button names and menu layouts vary, so parents should check the instruction manual for model-specific controls. Do not assume every camera in this category works the same way.
Step 4: Show Your Child How to Hold the Camera
This step is surprisingly useful. A steady hold makes a visible difference in photo clarity.
- Hold with two hands when possible
- Keep fingers away from the lens
- Keep the camera reasonably steady
- Point the lens toward the subject
- Look at the screen before pressing the shutter
For younger children, demonstrate first rather than giving a long explanation. One clear example is worth more than several sentences.
Step 5: Take the First Photo
Choose a simple test subject:
- Favorite toy
- Parent
- Stuffed animal
- Pet
- Bright object
Start with a still object. It is easier for a child to learn framing when the subject is not moving. Then walk through this simple sequence:
Point → Pause → Press → Check
That becomes an easy memory rule the child can repeat on their own.
Step 6: Preview Before Printing
Not every picture needs to be printed. This is the single most useful habit to build early.
Teach children to ask:
- Is the subject visible?
- Is the photo too dark?
- Is a finger covering the lens?
- Do I actually want to keep this one?
The “Look Before You Print” Rule
Take 3 → Choose 1 → Print 1
This teaches decision-making, reduces wasted thermal paper, and makes each print feel more intentional. It also mirrors the kind of choice-making that supports early executive function.
Step 7: Print the Photo
Select the photo
Use the navigation buttons to choose the image you want to print.
Choose print
Press the print button or select the print option from the menu.
Wait for the paper to feed out
Do not pull the paper while it is printing.
Tear or separate the print carefully
Some models have a tear edge. Others require manual separation.
Let the child decorate it
This is where the print becomes a creative project rather than a loose scrap of paper.
Thermal prints may appear different from the digital image on screen and are usually designed for fun, crafts, and memory-making rather than professional photo quality.
Step 8: Let Kids Personalize the Print
This turns the camera into a creative activity rather than just a device.
- Add the child’s name
- Write the date
- Color the print
- Add stickers
- Create speech bubbles
- Write a short caption
- Glue it into a scrapbook
This is where the camera becomes more than a gadget. The print becomes something the child made, not just something the child received.
A Simple 10-Minute Session
For overwhelmed parents who want a clear first-use routine.
- Minute 1–2: Show the controls
- Minute 3–4: Take two practice photos
- Minute 5: Preview both
- Minute 6: Choose one
- Minute 7: Print it
- Minute 8–10: Decorate or talk about the photo
Parents who want more activity ideas can also browse the HA Baby Toys blog.
How to Teach Framing Without Making It Complicated
Keep the subject in the screen
Start there. If the subject is visible on the screen, the photo is likely fine for a child’s purpose.
Move closer instead of zooming
If the camera has limited digital zoom, walking closer often produces a simpler result.
Watch the background
Teach the child to notice what is behind the subject. A clean background makes the subject clearer.
Hold still for one second
Especially useful with basic kids cameras. A brief pause before pressing reduces blur.
Do not turn it into a formal photography course. The goal is a fun, roughly framed photo the child is proud of.
Fun Photography Games
These short activities give the camera a purpose and turn photography into a small game.
Color hunt
Take pictures of something red, something blue, and something green.
Shape hunt
Find a circle, a square, and a triangle around the house or garden.
Family portrait challenge
Photograph different family members, one at a time.
Nature hunt
Take pictures of leaves, flowers, clouds, rocks, and trees.
Toy story
Arrange toys and take photos that create a simple story.
Before and after
Photograph a messy desk, then the clean desk.
My day
Take five photos showing different parts of the day.
Alphabet hunt
Find and photograph objects starting with different letters.
How to Use the Printed Photos for Learning
You can expand beyond photography. Printed photos are physical objects, and that opens up simple learning activities.
- Story sequencing: Arrange three prints in order.
- Vocabulary: Write the name of the photographed object underneath.
- Memory game: Print matching or similar pictures.
- Family album: Build a small scrapbook.
- Travel journal: Add printed pictures from trips.
- Reward charts: Use photos as visual reminders or achievements.
Keep educational claims modest and practical. The National Association for the Education of Young Children (NAEYC) describes hands-on creative play as a core way young children learn, and UNICEF Parenting highlights responsive parent-child interaction as a key driver of early development. The Harvard Center on the Developing Child explains how back-and-forth experiences build early brain architecture.
How to Use Video Mode
Many instant print cameras for kids also include basic video recording, turning the device into a simple kids video camera as well.
Possible activities:
- Mini interview
- Toy review
- Birthday message
- Pet video
- Nature clip
- “Show and tell” recording
Videos usually remain digital and are not printed. The printed output is for photos only, so parents should not expect to print a video clip.
How to Save Digital Photos
Common possibilities across models include:
- Internal memory
- microSD card
- USB transfer
- Computer backup
Parent Tip
If the camera supports removable storage, back up important photos before formatting or replacing the card. Thermal prints can fade, so the digital copy is often the one worth protecting long-term.
How to Transfer Photos to a Computer
- Turn off the camera if required.
- Connect by USB or remove the memory card.
- Open the storage folder.
- Copy photos to the computer.
- Create a dated folder.
- Safely disconnect.
Not every model supports direct USB transfer. Check the product details for the exact method your camera uses.
How to Avoid Wasting Thermal Paper
This is one of the most practical parent concerns. Here is what actually works.
- Preview before printing
- Use a daily print limit
- Print only favorites
- Teach “take three, choose one”
- Save digital copies instead of printing everything
- Keep paper rolls stored properly
- Use compatible paper
Paper-Saving Rule
Capture freely → Print selectively
This keeps the camera fun without turning every session into a paper budget decision.
Common Problems and Quick Fixes
If something is not working, find the problem and try the matching fix.
| Problem | Try This |
|---|---|
| Camera will not turn on | Charge the battery and check the power button |
| Photo is blurry | Hold still and use better light |
| Prints are blank | Check paper orientation and compatibility |
| Paper will not feed | Reload the roll carefully |
| Child prints everything | Use a print limit and preview rule |
| Storage is full | Transfer or delete unneeded files |
| Video will not save | Check available storage |
| Camera freezes | Follow the model’s restart instructions |
What If the Prints Are Too Light?
Common possibilities include:
- Paper is incompatible
- Roll is installed incorrectly
- Printer head may need approved maintenance
- Print density setting may exist
- Paper quality may vary
Do not disassemble the printer. Follow the manufacturer’s instructions for maintenance, and contact support if the problem continues.
What If the Photo Looks Better on Screen Than on Paper?
This is normal. The screen shows a digital image, while thermal printing creates a simplified monochrome print. Fine detail, contrast, and shading can look different.
Understanding this upfront prevents disappointment. Thermal prints are for fun, crafts, and memory-making — not for archival or professional quality output.
Safe Use Guidelines
Before and during every session
- Follow the manufacturer’s age guidance
- Supervise younger users
- Inspect the camera and accessories regularly
- Keep charging cables managed and out of the way
- Avoid damaged batteries or swollen components
- Use only recommended thermal paper
- Keep small removable parts away from younger siblings
- Follow recall information where applicable
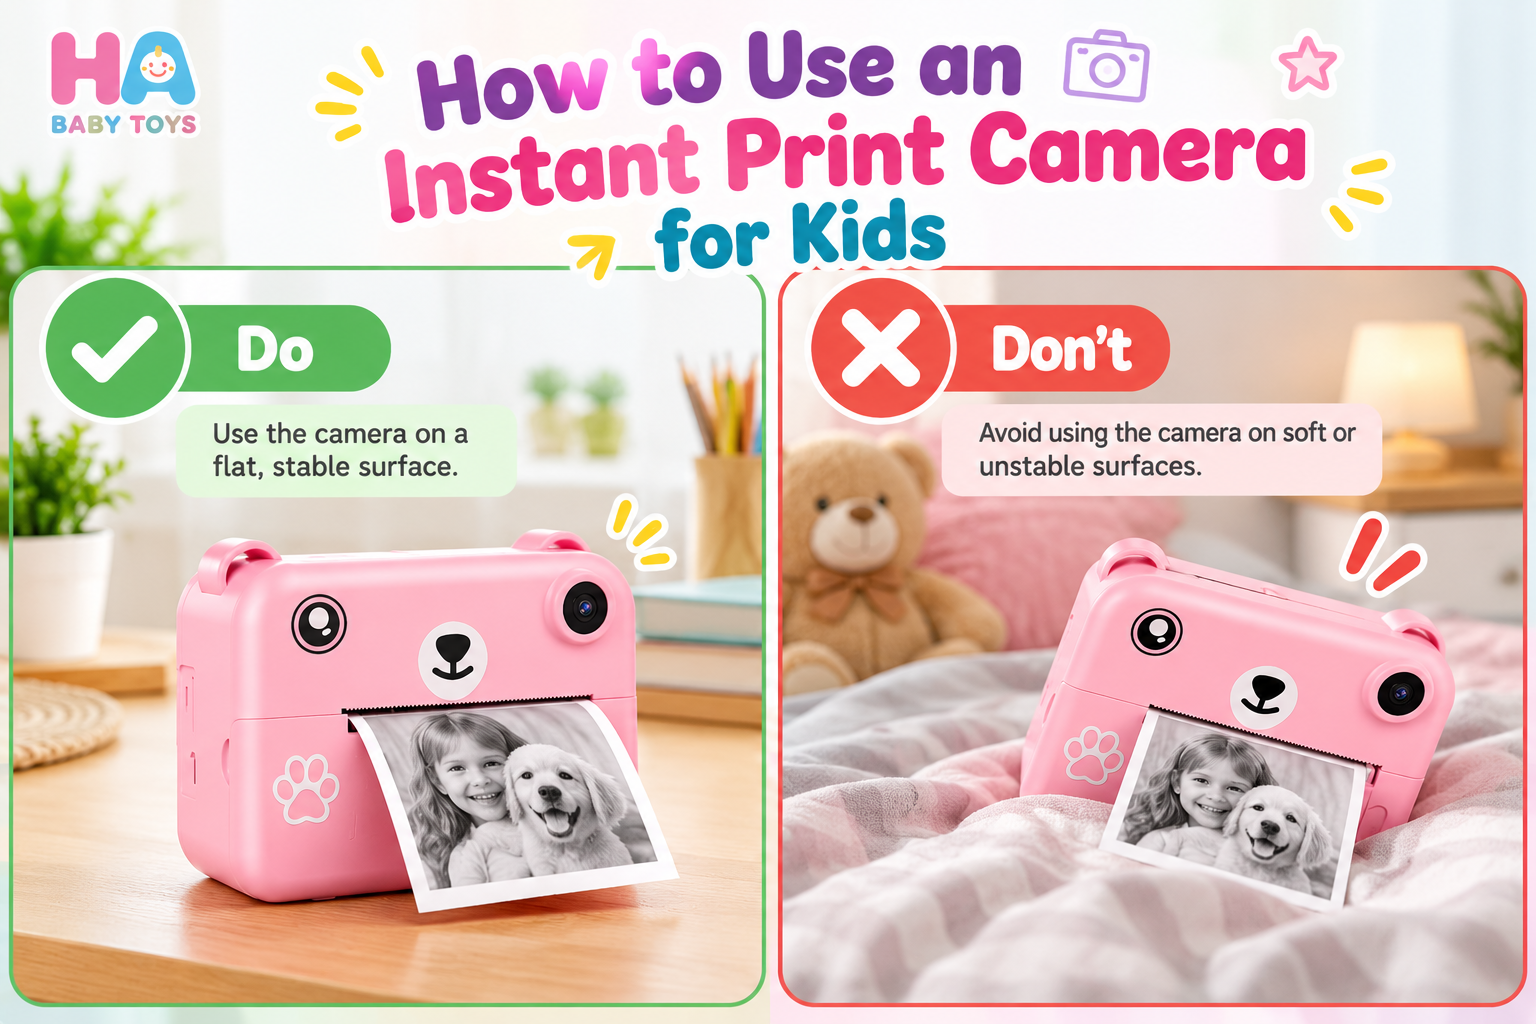
For product-safety context, the U.S. Consumer Product Safety Commission provides guidance on children’s products, recalls, and hazards. HealthyChildren.org from the American Academy of Pediatrics covers safe play practices in more detail. The American Academy of Pediatrics also publishes family media guidance that can help parents set expectations around any device.
Privacy and Responsible Photography
This matters more than most parents expect. A camera teaches children early habits around consent and privacy.
- Ask before photographing others
- Avoid photographing private information, documents, or screens
- Do not post children’s photos publicly without parental decisions
- Check whether the camera has Wi-Fi or Bluetooth
- Check where photos are stored and whether they leave the device
For guidance on children’s privacy and connected products, the U.S. Federal Trade Commission’s children’s privacy resources explain the rules that apply to products marketed to children. Common Sense Media publishes independent guidance on connected toys and devices, and the Google Safety Center for families covers general device safety topics if the camera connects to other services.
How Parents Can Set Simple Camera Rules
Our Camera Rules
- Ask before taking someone’s photo.
- Keep the strap on when walking.
- No camera near water unless it is rated for it.
- Preview before printing.
- Put the camera back after play.
- Ask an adult before changing settings or storage cards.
How to Clean and Store the Camera
Always follow the manufacturer’s cleaning instructions. General guidelines that apply to most models include:
- Use manufacturer-approved cleaning methods
- Keep moisture away from ports
- Do not use harsh chemicals unless approved
- Store thermal paper dry and cool
- Keep the camera in a protected place
- Remove damaged paper rolls
- Check cables periodically for wear
Exact cleaning depends on the product. If in doubt, check the manual or contact the manufacturer rather than guessing.
What If My Child Gets Bored?
Boredom is normal, especially after the first few sessions. Here are quick ways to refresh the activity.
Change the mission
Instead of “take photos,” say: “Find three yellow things.”
Add a story
Take three photos with a beginning, middle, and end.
Let them be the photographer
Parents become the subject. Children love directing adults.
Go outside
Use the camera on a nature walk for fresh subjects.
Limit the session
Short sessions can keep the activity fresh instead of exhausting it.
Ready to compare kids instant print cameras?
Explore the HA Baby Toys Shop →Frequently Asked Questions
How do I use an instant print camera for kids?
Charge it, load the compatible thermal paper, turn it on, take a photo, preview the image, and print only the pictures you want to keep. The full step-by-step process is covered above.
How do I load thermal paper?
Open the paper compartment, insert the compatible roll with the printable side facing the correct direction, leave a short edge outside the slot, close the compartment securely, and print one test image to confirm.
Why is my kids camera printing blank paper?
Usually the roll is inserted on the wrong side, or the wrong paper type is installed. Check the orientation first before assuming the printer is faulty.
Does a kids instant print camera need ink?
Thermal models usually do not. They use heat and thermal paper instead of ink cartridges. If a model uses a different printing method, the product page will specify the requirements.
How do I stop my child from wasting paper?
Teach the “take three, choose one” rule, use a daily print limit, and preview before printing. The habit of previewing is the single most effective change.
Can kids save photos without printing them?
Many models save photos digitally, either in internal memory or on a microSD card. Check the specific product details for your camera.
Can the camera record video?
Many models include video mode, which turns the device into a simple kids video camera too. Video is normally saved digitally and not printed.
How do I transfer photos to a computer?
Turn off the camera if required, connect by USB or remove the memory card, open the storage folder, copy the photos, and safely disconnect. Check whether your specific model supports direct USB transfer.
Why are printed photos black and white?
Most thermal printers in this category produce monochrome prints. The digital photo on screen is usually in color, but the printed output is typically black and white.
What should I do if the print is too light?
Check the paper type and orientation first. Some models have a print density setting. If the problem continues, contact the manufacturer rather than disassembling the printer.
How do I clean the camera?
Follow the manufacturer’s cleaning instructions. Keep moisture away from ports, avoid harsh chemicals unless approved, and remove damaged paper rolls promptly.
How should thermal paper be stored?
Store it dry and cool, away from direct sunlight and heat. Proper storage helps prevent fading and feeding problems.
Can kids use the camera outdoors?
Yes, unless the model is not rated for outdoor use or moisture. Check the product details. Outdoor photography is one of the best ways to keep the activity interesting.
How can I make photography educational?
Use printed photos for story sequencing, vocabulary, memory games, and travel journals. The HA Baby Toys FAQ also answers common product and ordering questions.
What are some easy photography games for kids?
Try color hunts, shape hunts, nature hunts, toy stories, before-and-after photos, and “my day” five-photo challenges. Visit the HA Baby Toys blog for more ideas. Retailers and larger buyers can also request a quote from HA Baby Toys.
The Short Version for Busy Parents
Using a kids instant print camera is not complicated once you understand the flow: charge it, load the paper correctly, take a photo, preview it, and print only what is worth keeping. The rest is play.
If you want to understand the creative value behind the device, the guide on why parents may choose a kids camera with printer for creative play covers the wider benefits. And if you are still deciding whether this category is right for your family, HA Baby Toys offers children’s toys and activity products for everyday play, including instant print cameras designed for exactly this kind of hands-on use.