
A kids visual countdown timer works best when it is simple, visible, predictable, and connected to one clear activity. Set the time, explain what will happen when it ends, keep the timer in view, and follow through consistently.
If you are still learning what this type of device does, start with the guide explaining what a visual timer for kids is. This article assumes you already have one — or are about to — and want to know exactly how to use it without turning it into another complicated routine.
How to Use It
- Choose one activity.
- Set the countdown.
- Put the timer where the child can see it.
- Explain what happens when time ends.
- Give a short warning near the end.
- Follow through calmly.
Set → Show → Warn → Finish
The four-stage workflow behind every successful timer session
Visual Timer
Set. Show. Warn. Finish.
Set
Choose the amount of time.
Show
Keep the countdown visible.
Warn
Give a 5-minute or 1-minute reminder where appropriate.
Finish
Move calmly to the next activity when the timer ends.
Set → Show → Warn → Finish
Step 1: Start With One Simple Activity
Do not introduce the timer during the hardest part of the day first. Start with something low-pressure, such as:
- 5 minutes of coloring
- 10 minutes of play
- 5 minutes before cleanup
- 10 minutes of reading
The child first needs to understand what the timer means before it becomes useful during difficult transitions. Introducing it during a conflict, like the middle of a screen-time argument, makes the timer feel like a punishment tool rather than a routine helper.
Step 2: Set a Short Countdown
For first-time use, shorter intervals are easier to understand. Try:
- 1 minute
- 3 minutes
- 5 minutes
Then gradually use longer periods. This gives the child a chance to see the full cycle:
Start → time passes → timer finishes
before trying 20–60 minute sessions. The ZERO TO THREE organization emphasizes that young children learn routines best when they are predictable and repeated. A short, consistent timer cycle supports that.
Step 3: Explain What Happens at Zero
Use one simple sentence. Examples:
- “When the timer finishes, we put the toys away.”
- “When the red part is gone, homework is finished.”
- “When the timer reaches zero, it is bath time.”
Avoid long explanations. The visual countdown should support the rule, not replace it. One rule, one phrase, said the same way each time, works better than a new script every session.
The CDC developmental milestone resources note that understanding of time and sequence develops gradually across the toddler and preschool years, which is why concrete, simple language works better than abstract concepts.
Step 4: Put the Timer Where the Child Can See It
Visibility matters. Good locations:
- Desk
- Shelf
- Kitchen counter
- Play table
- Classroom table
Avoid placing the timer:
- Behind the child
- Inside a drawer
- Somewhere far away
A visual timer cannot help much if the child cannot see the visual countdown. This sounds obvious, but it is the most common practical mistake parents make when first using one.
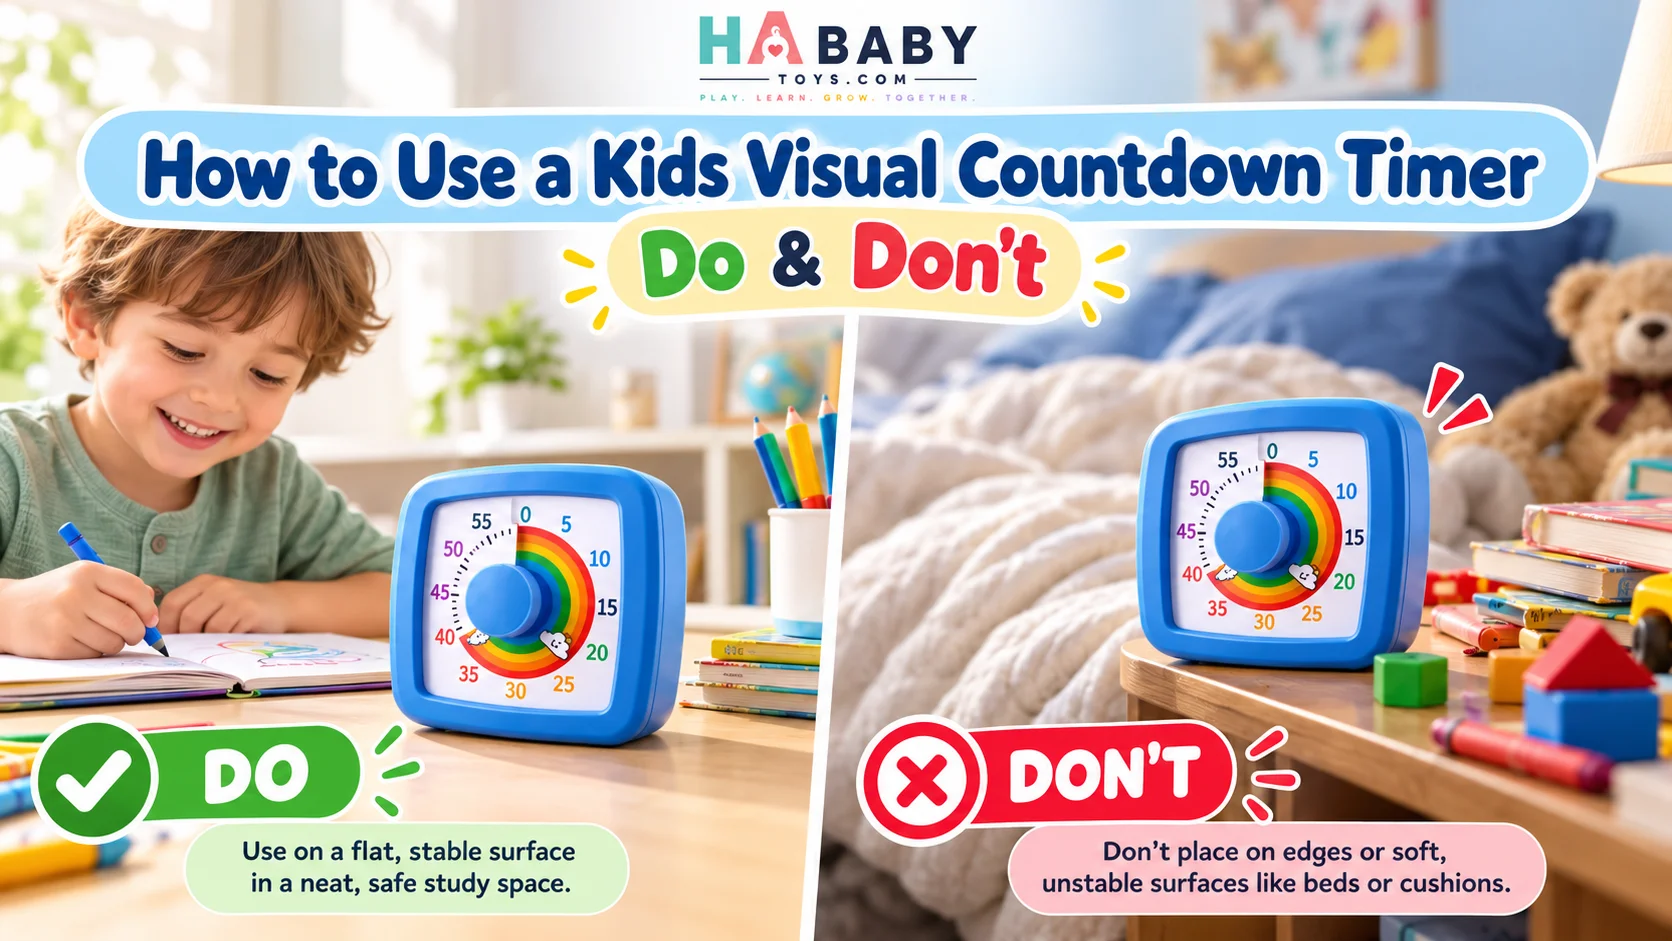
Where to Place the Timer
Good placement vs. placement that limits the timer’s usefulness
Good placement
- Eye level
- Clear view
- Stable surface
- Away from spills
Avoid
- Hidden from view
- Too far away
- Easy to knock over
- Near water or heat sources
Step 5: Give Transition Warnings
This is one of the strongest practical steps. Instead of waiting until zero, try:
10 minutes left → 5 minutes left → 1 minute left → finished
For younger children, simple wording is best:
- “A little time left.”
- “One minute.”
- “All done.”
The timer works best as part of a predictable transition. The National Association for the Education of Young Children (NAEYC) highlights how consistent routines help young children feel secure, and transition warnings are a small but important part of that consistency.
Step 6: Follow Through Consistently
If the timer ends but the rule changes every time, children may stop trusting the timer. If the rule is “When the timer ends, we clean up,” then try to follow that rule consistently.
Do not use the timer as a threat. Instead of:
“If you don’t finish before the timer, you’re in trouble.”
Use:
“The timer shows how much time we have.”

How to Use It for Playtime
Playtime is a good early use because the stakes are low and the activity is naturally engaging.
Set 15 minutes
Choose a time that matches the child’s attention span.
Tell the child they can play until the timer ends
One clear rule, stated once.
Give a 5-minute warning
Move the timer slightly closer or point at it.
Give a 1-minute warning
“One more minute.”
Clean up after zero
Follow through calmly, without escalation.
How to Use It for Toy Cleanup
Use the timer as a clear ending rather than punishment. For example:
“We have five minutes to put the blocks away.”
You can turn cleanup into a simple challenge, but avoid making speed the only goal. The purpose is structure, not speed. If cleanup becomes a race every time, the child may start avoiding the routine altogether.
How to Use It for Homework
For school-age children, try:
20 minutes work → short break
or
25 minutes focus → 5 minutes break
This naturally introduces Pomodoro-style timing. The Understood.org organization offers practical guidance on time-awareness tools and structured work sessions for children who benefit from visible routines.
For older children and adults, the same timer can also support longer structured focus sessions — which is one of the reasons a 60-minute timer covers more use cases than a shorter one.
How to Use It for Reading
Set:
- 10 minutes
- 15 minutes
- 20 minutes
Tell the child: “We read until the timer finishes.” This can make the routine feel manageable because the child knows when it will end. It also gives the child a clear signal that reading time is finite, which often reduces resistance more effectively than an open-ended “read for a while.”
How to Use It for Screen Time
This is one of the most relevant use cases for parents.
Before screen time
Set the timer before the device is opened.
Say the time out loud
“You have 20 minutes.”
Keep the timer visible
Place it where the child can see it without turning away from the screen.
Give a warning near the end
“Five minutes left.”
Follow through at zero
Put the device away, calmly.
Starting the timer before screen time begins is usually clearer than announcing the limit halfway through. It gives the child the full duration and a visible, honest countdown.
For broader guidance on family media habits, the American Academy of Pediatrics and HealthyChildren.org both publish balanced recommendations.
Visual Timer for Morning Routines
A simple morning sequence:
- 10 minutes: Get dressed
- 5 minutes: Brush teeth
- 5 minutes: Shoes and bag
The overall flow can be described as:
Dress → Brush → Shoes → Leave
Use one timer per step if necessary. Some families find that a single longer countdown for the whole routine works better than several short ones — try both and see which fits your morning.
Visual Timer for Bedtime Routines
Do not frame the timer as forcing sleep. Instead, use it to structure routine steps:
- Pajamas
- Tooth brushing
- Story
- Lights down
Example timing:
- 10 minutes for bath
- 5 minutes for pajamas
- 10 minutes for story
If the timer includes a night light, this is a natural place to use it — the countdown becomes easy to see in a dim room without turning on a bright overhead light.
Night Light + Timer Routine
Possible evening uses:
- Low-light visibility
- Quiet bedtime countdown
- Reading timer
- Wind-down routine
A night-light feature can make the timer easier to use in dim rooms, but it should not be presented as a sleep treatment. It is a visibility feature, not a sleep aid.
How to Use the Timer With Toddlers
For toddlers:
- Use short intervals
- Give one instruction
- Keep the timer visible
- Use the same words each time
- Avoid changing rules frequently
Example: “When the red part is gone, bath time.”
That is much easier than: “You have 7 minutes and 30 seconds before we transition.”
How to Use It With Older Children
For school-age kids, involve them more. Ask:
“How long do you think you need?”
Then let them help set the timer. Possible uses:
- Homework
- Reading
- Getting ready
- Chores
- Practice sessions
This can create more ownership, which makes the timer feel like a tool the child uses rather than something imposed on them.
How Teachers Can Use It in Classrooms
Possible classroom uses:
- Independent work
- Group work
- Cleanup
- Reading stations
- Test practice
- Activity transitions
- Breaks
The Understood.org organization provides practical guidance on classroom routines and time-awareness tools for children who benefit from visible structure.
Daily Routine Timeline
One timer, five natural uses across the day
Getting ready
10-minute countdown for dressing, teeth, and shoes.
Classroom blocks
Timed work stations and cleanup.
Focus block
20-minute work session with a break after.
Free play
15-minute play with warnings before cleanup.
Story time
10-minute story countdown before lights down.
What If My Child Keeps Resetting the Timer?
Practical fixes:
- Parent controls it initially
- Place it slightly out of reach
- Explain when they may touch it
- Let them press start only
Avoid turning it into a power struggle. The timer should feel like part of the routine, not a new argument to have every day.
What If My Child Ignores the Timer?
Try:
- Shorter countdown
- More visible placement
- Verbal reminder
- Clearer rule
- Lower-stress practice
| Problem | Try This |
|---|---|
| Child ignores it | Move it closer |
| Child does not understand | Practice with 1 minute |
| Child argues at zero | Add warnings |
| Child resets it | Parent controls setup |
| Child gets distracted | Reduce timer length |
| Child becomes upset | Stop and try another strategy |
What If the Timer Causes Stress?
A visual timer should make routines clearer, not harder. If it seems to create anxiety:
- Stop using it in that situation
- Reduce the interval
- Use verbal cues instead
- Try again another day
Not every child responds well to countdowns, and the timer should be adapted to the child rather than forced. This is general guidance, not medical advice. If you have ongoing concerns about your child’s response to transitions or routines, speak with a pediatrician or child development professional.
How Long Should You Set the Timer?
| Duration | Best For |
|---|---|
| 1–5 minutes | Quick transition or cleanup |
| 5–15 minutes | Play, reading, getting ready |
| 15–30 minutes | Homework, crafts, focus |
| 30–60 minutes | Longer study, quiet play, adult focus |
This is where a 60-minute visual timer earns its keep — it covers all these intervals in one device. Parents who want a fuller buying case can read why parents may choose a 60-minute visual timer for kids.
Visual Timer vs Stopwatch
Visual countdown timer
Starts at a selected number and moves toward zero. Best when asking: “How much time is left?”
Stopwatch
Starts at zero and counts upward. Best when asking: “How long did this take?”
For routines and transitions, a countdown is usually easier. A stopwatch is more useful for tracking duration after the fact.
How to Use the Timer for Pomodoro Sessions
For older kids, teens, or adults, a visual timer fits the Pomodoro method well.
Typical approach:
25 minutes focus → 5 minutes break → repeat
You can read the formal definition and history of the technique at the official Pomodoro Technique resource. Because the countdown is visible at a glance, the timer supports this method without any need to check a phone or set up an app.
Safety and Practical Use
Before and during every session
- Place on a stable surface
- Keep away from water unless rated
- Manage charging cables
- Follow battery instructions
- Keep alarm volume comfortable
- Inspect for damage
- Follow manufacturer directions
For product safety guidance, the U.S. Consumer Product Safety Commission publishes information on children’s products, recalls, and hazards.
Who Uses a Visual Timer Most?
Before Buying a Kids Visual Countdown Timer, Ask:
- Is the countdown easy to see from where my child sits?
- Can I set short and long intervals?
- Does it support up to 60 minutes?
- Is the alarm adjustable?
- Can my child understand the display?
- Is it easy to place on a desk or bedside table?
- Does it include useful extras such as a night light?
- Is it simple enough for everyday routines?
Parents ready to compare available options can browse the HA Baby Toys shop.
Ready to put a visual timer to work in your routine?
Explore the HA Baby Toys Shop →Frequently Asked Questions
How do I use a kids visual countdown timer?
Choose one activity, set the countdown, place the timer where the child can see it, explain what happens at zero, give a short warning near the end, and follow through calmly. The full step-by-step process is covered above.
How do I introduce a visual timer to a child?
Start during a calm, low-pressure activity. Show the timer, set a short practice countdown of 1–2 minutes, explain what happens at zero, and follow through consistently. Practicing before you need it makes the timer feel normal.
How long should I set the timer for?
Use 1–5 minutes for quick transitions, 5–15 minutes for play or reading, 15–30 minutes for homework or crafts, and 30–60 minutes for longer study or quiet focus. Start shorter and build up.
Can toddlers understand a visual timer?
Many toddlers can understand a visual timer with parent support. Keep countdowns short, use one simple instruction, keep the timer visible, and use the same words each time. Always follow the manufacturer’s age guidance.
How do I use a visual timer for screen time?
Set the timer before the device is opened, say the time out loud, keep the timer visible, give a warning near the end, and follow through at zero. Starting the timer before screen time begins is clearer than announcing a limit halfway through.
Can I use it for homework?
Yes. Try 20-minute work blocks with short breaks, or 25-minute focus blocks with 5-minute breaks. The visual countdown helps children see that the work has a defined end.
Can teachers use visual timers?
Yes. Teachers use visual timers for independent work, group work, cleanup, reading stations, test practice, and activity transitions. The Understood.org organization provides practical guidance on classroom routines and time-awareness tools.
What should I do if my child ignores the timer?
Try shorter countdowns, move the timer into clearer view, give a verbal reminder, use a clearer rule, and practice during a lower-stress activity. Ignoring the timer usually means the timer is not yet connected to a routine the child understands.
What if the timer causes anxiety?
Reduce use, try shorter intervals, keep it out of high-pressure situations, and use verbal cues instead. Stop using it if it consistently increases stress. This is general guidance, not medical advice — speak with a pediatrician if you have ongoing concerns.
Should I give countdown warnings?
Yes, warnings usually help. Try 10-minute, 5-minute, and 1-minute warnings for longer countdowns. For younger children, simple phrases like “A little time left” or “One minute” work well.
Can children set the timer themselves?
For older children, yes — involving them in setting the timer can create more ownership. For toddlers, keep controls parent-managed initially and let the child press start only.
What is the difference between a timer and stopwatch?
A countdown timer starts at a chosen time and moves toward zero — best when asking “How much time is left?” A stopwatch starts at zero and counts upward — best when asking “How long did this take?”
Can I use it for Pomodoro sessions?
Yes. A 60-minute visual timer fits Pomodoro-style work well. The typical pattern is 25 minutes focus, then 5 minutes break. The official Pomodoro Technique resource explains the standard method.
Can the night light be used at bedtime?
Yes. A night-light feature makes the timer easier to see in a dim room, which can help with evening routines like story time or wind-down. It is a visibility feature, not a sleep treatment. The HA Baby Toys FAQ also answers common product and ordering questions.
How do I use a 60-minute timer effectively?
Use shorter intervals for transitions and longer intervals for focus work. A 60-minute timer covers everything from 5-minute cleanup to 25-minute study blocks. For a fuller buying case, see why parents may choose a 60-minute visual timer for kids. Retailers and larger buyers can also request a quote from HA Baby Toys.
The Short Version for Busy Parents
Using a kids visual countdown timer is not complicated once you follow the four-stage workflow: set the time, show the countdown, warn before the end, and finish calmly. The rest is consistency.
Start with one activity. Keep the countdown short. Use the same words each time. Follow through at zero. Once the routine is familiar, you can extend the same pattern to homework, screen time, morning routines, and bedtime without changing the method.
For more practical parent guides and family-friendly products, HA Baby Toys offers tools designed around everyday family routines. You can also browse the HA Baby Toys blog for more guides on routines, transitions, and screen-free play.